[This article was originally published in June 2020 and has been updated for comprehensiveness.]

Before learning about SEO, I don’t really care about what to do before and after publishing a blog post. I just write things and publish it as I want. Well, beginner bloggers mostly do the same.
THAT’S TOTALLY WRONG.
I did a lot of research after 3-4 months into blogging, and there’s a bunch of behind the scenes that go into growing your blog traffic. They ensuring that your blog post has the quality content that you want, not just a simple ‘blog post’.
When creating a blog post that people want to read and Google want to index, unfortunately, it’s not just about writing with passion and waiting for the best. There are several things you must take care of before you hit the publish button!
Before you begin, you may need to check these essential settings you need to do after installing WordPress. And here are the checklist before and after publishing a blog post. You will be on right path to creating a well-structured ang engaging article that gets ranked on Google.
Before Publishing A Blog Post
Keyword Research
Keyword research is a must. Before starting to write your blog post, you should always have some keywords in mind and make sure that your content is based on those keywords.
- Use Google Trends, Ubersuggest, or KWFinder to find your keywords. Search for a phrase that you think people might use for your content and refine it into a few words.
- Once you have your keywords, find some long-tail keywords which you can use within your content. For example, ‘before publishing post’ is a long-tail of the post. It’s going to be much easier for Google to rank ‘before publishing post’ rather than on ‘blog post’ alone.
- As I use Rank Math SEO plugin, the focus keyword evaluates my post’s content and provides feedback on how to improve the content to rank higher for those keywords.
Create An Outline
Once you have your keywords, use those words to create your content. Are you going to write list posts, how-to guides posts, products, or services? This kind of information will help you to decide on a structure for your blog post.
Just like this post, I make a list post and write down all of my points for each heading. Then add a short explanation, notes, and related links. This will help me to know what to write when I’m going to improve my post later.
Catchy Title and Permalink
Create your title that hooks your audience’s attention and makes them want to click on your blog post. Always include your focus keywords, power word, and number on your title. Don’t forget to edit your permalink so it contains your keywords.
Write Your Post and Optimize Your On-Page SEO
- Introduction: 2-3 short paragraphs which draws your audience to read the rest of the content, makes sure to include your keywords.
- Make it interesting and address the need of your intended audience
- Don’t make it too short or even too long
- Always include the conclusion/wrapping up section at the end
- Use your keywords multiple times within your content – spread them out throughout your post. Rank Math help me to analyze my content.
Meta Tile and Meta Description
Add post’s Meta title and description is really important for SEO because this is what will be displayed in search results.
- As shown below, with Rank Math SEO, I just need to click on Edit Snippet and enter a Meta description.
- Include your keywords in the description. Don’t worry, Rank Math will prompt it if your text gets too long.

Add Alt Text To Images
Always remember to add alt text on your image. The alt text describes what the image is about, helps with accessibility, and helps Google to understand the purpose of the image.
Before uploading images, edit your image from 6897493294.jpg to before-publishing-a-blog-post.jpg. You can add ALT text by editing the image in the library.
Check Your Post Structure
- Use short paragraphs – it helps out all types of readers if you break up your content into paragraphs.
- Use headings – it helps people to find specific information
- Don’t forget to add your new post into one of your categories – each topic area that your blog post about
Check this my guest post on how I structured my blog post!

Add Internal Link
Adding links to the related posts within your content is helpful for your reader. It keeps them engaged for longer, leads them to other posts on your site, and helps to reduce your bounce rate (rate in which readers navigate away from your site after arriving). If your bounce rate is low means that people stay longer on your site and show greater engagement. Check your bounce rate on your Google Analytics.
When writing a new blog post, I know that I have another blog post that is related to my new post then I will add a link to that blog post. Sometimes I also repeat this a bit in case people don’t want to click yet.
Linking to internal post also helps your SEO – as Google understand your site structure. You can add links within your text, at the end of the post, or related posts section.
Add Outbound Links + ‘Nofollow’
An outbound link is a link to another site other than your blog. It adds richness to your content and shows that you respect the opinions of other content creators. For example, outbound link:
You can check out how to set up Rank Math SEO.
See what I did above? I referenced Rank Math SEO and added a link to them.
But remember to give the link a no-follow attribute. For a small blog, like mine, every time you add a link to an external site, it gives your link juice to another site, which means that a higher ranked site will give harm your own ranking.
So, with the no-follow attribute, it tells Google not to follow the link when it indexes your site! You can add no follow to links manually or better to use a plugin so you won’t forget. By using Rank Math SEO, you can automatically add a no-follow attribute to all of your external links.
Check Affiliate Links
If you are trying to make your blog a career, it’s time to get into monetizing. Even you just started your blog and are not ‘big’ yet, you can still apply to the affiliate program.
If you have linked to your affiliate products, make sure you have added your affiliate links. To make it pretty, I use Pretty Links to make my own links and manage all my affiliate links.
Check Grammar
As a freelance translator, I always use Grammarly for checking my grammar. Even though English Literature was my B. A degree, I’m not really good with grammar. My spelling is good and I do understand English but when it comes to writing, I definitely need help!
If you’re not native in English (like me), I recommend using Grammarly now. I learned better English by using Grammar. You can run it as your browser extension and it will automatically check everything that you write on the internet, such as your blog posts, email, social posts, note, etc.
Insert Featured Image
If you like taking photos and have a good image to share, you can post it on your post. An eye-catching image helps to engage with your reader.
You can also find free images on sites like Pexels, Unsplash, and Pixabay and there are many more. If you have the budget to purchase stock images, then you are much less likely to find the same image used elsewhere.

Remember to always make sure you have permission to use any images wherever you get them.
Create Pinterest Pin
To run a successful blog, you have to promote your content. One of the best and free ways to promote your blog post is to have a pinnable image on your post. What is a ‘pinnable’ image?
It’s an image you create and insert on your post – when people read your post, they have an image they can share on Pinterest that will (hopefully) bring traffic to your blog. You also need to use a featured image for your post. Adding these images makes you look much better. I create my pins by using Canva and it is the same size as Pinterest size.
Add Social Sharing Buttons
Always make sure that your post is shareable on all major social platforms. There are so many social plugins you can choose from, such as Easy Social Share Buttons. You only need to set it up and it will add sharing buttons at the top or bottom of your posts.
Insert A CTA
Growing and building a connection between you and your audience is always important. A call to action is an action that you want your audience to do, such as join a mailing list, purchase a product, or simply leave a comment on your post.
Every post you write should have a call to action at the end of the post or in the body of the post. More examples of CTA include social sharing buttons, follow on social media, or affiliate links.
Create A Content Upgrade
An effective way to grow your e-mail list is to provide a freebie or useful checklist relevant to the post they are reading. You also can offer your freebie when they sign up for your mailing list.
After Publishing A Blog Post
Promote Your Post
- Subscribers: You want to let your subscribers know about your new blog post and mention any exciting news (offer, freebie, deals) you might have to share. If you publish a new blog post frequently, refrain from e-mailing them every time you post. The best way, you could create a weekly newsletter that informs of all the new blog posts you published. Emailing too often can get annoying (which I hate the most) and may lead some to hit the ‘unsubscribe’ button.
- Twitter: I love this the most! I find that Twitter is surprisingly really great for the blogging community. After publishing my new blog post, I will promote it on my Twitter. I use hashtags and tag feature accounts who will retweet my tweet. I also love sharing my daily threads where I can engage more with other bloggers. These threads allow me to exchange comments to help each other grow!
- Facebook: There are so many FB groups out there who share daily threads, such as blog post share, blog post comment, etc. Participate in these groups twice a day – set up about 15-30 minutes (at the end and beginning of each day) and use the groups to increase your blog traffic. They are so nice and I love being part of the blogger community!
- Instagram: I have a love-hate relationship with Instagram as I don’t have much activity there. But if you love and use it every day, you can create an Instagram post when you publish a new blog post. Insert ‘link in my bio’ on your post so people can check out your new post.
Add To Pinterest
Meet with Pinterest again!
Once you publish your new blog post, you should share it with your Pinterest by using your Pinnable image. You need to share it with multiple boards and group boards. For starting, you can create a 3-5 pinnable image for each post and share it with your Pinterest.
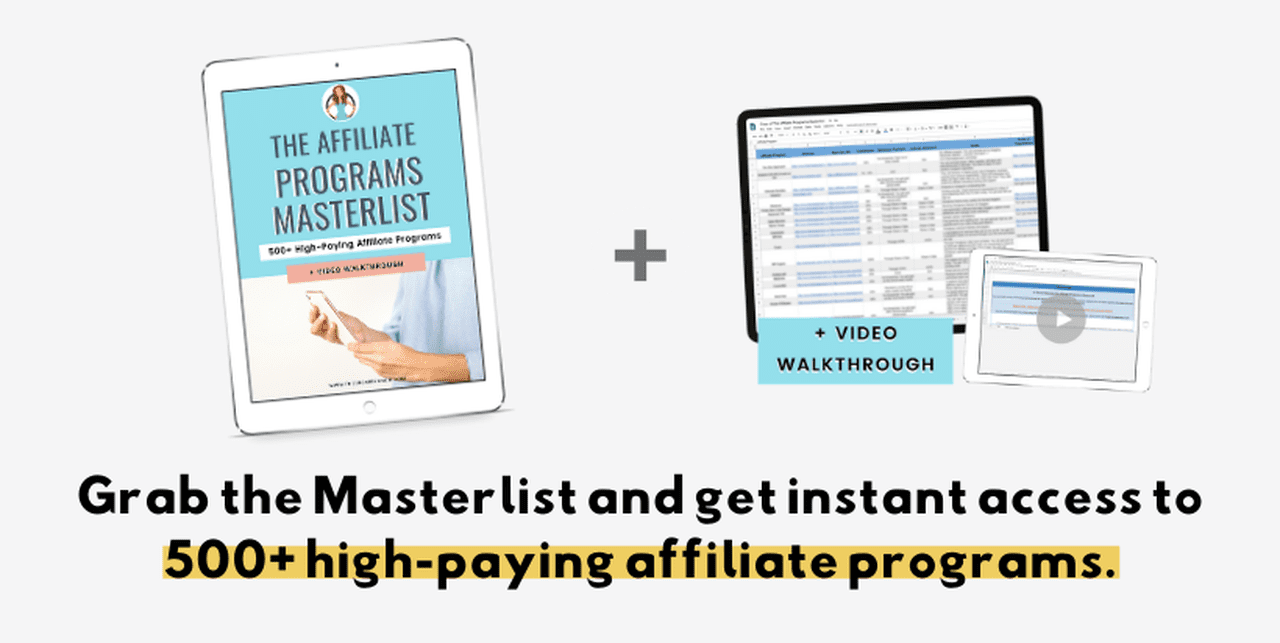
Well, those lists above cover all before and after publishing your post. Download below your free checklist before and after publishing a blog post.
Have you done all on this checklist? Any tips you want to add here? Let me know below!


This is a fantastic and thorough post! I’ve been blogging for a while, and I learned a lot from reading it (especially about the “no-follow,” links, which I will be spending the weekend updating on my posts). I still have a lot to learn, especially about keywords. Thanks for breaking it all down in this helpful post!
Me too! I just want to write this as complete as I can. I learned a lot from blogging, many things to be considered when I want to publish my post!
I don’t understand every single thing especially English is not my native xD
It’s fun but sometimes just make me wonder what other new things will I learned tomorrow!
Thank you for reading 🙂
Really informative post, I’ll be pinning it so I can use for reference whenever!
Thank you, dear!
Hi Merry! Thanks for sharing your wisdom on this post! While I knew about putting “nofollow” on my affiliate links, I had no idea this is also the case for other external links. Thanks for this valuable tip.
Here’s a tip from me 🙂 – since you use Pinterest (that’s how I found you), you should try Social Warfare plugin – it’s a must for bloggers that use Pinterest. Check it out. Or, you can check out my some of my posts 🙂
You’re very welcome! Thank you for your tip. I’ve seen many bloggers use Social Walfare plugin but I just use my Jetpack plugin as my social share buttons.
Thank you! I just installed it 🙂 I’ll visit your blog!
Great and thorough information to guide making a post. Thanks for sharing
You’re very welcome! Thank you for reading! xxx
Very well thought out! I found out about no-follow links earlier in the year and that was a bear going back and changing all the follow links! The keywords part still mystifies me a bit – picking just the right one to get a post to rank is so tricky for me!
Thank you! If you use Rank Math, I think you can set up your external links as no-follow links automatically. It goes for the old posts too.
Yeah, I still working hard on keywords. I just go with the flow and follow my intuition xD! xxx
So much wisdom in one post, I love it! I definitely need to spruce up my ‘blog to do” list, thank you so much for allll the wonderful ideas. “Consistency is key” – every blogger ever! hahaha, Great post girl, thanks for helping me grow as a blogger!
xo Bri
Thank you! I hope this post helps many bloggers out there, especially new bloggers 🙂
This is so helpful! there’s so many things to remember with each blog post and it’s nice to have it all in one place!
Glad you like it! Thank you 🙂
Great post! Thank you for the tips! They are very useful!
Thank you! xxx
Love this handy list! It always surprises fellow friends who do not blog or write how much work actually goes into writing something worthy and sharing it with the right eyes. 🙂
Great tips and advice. Thanks for sharing!
I was actually looking for guides to help me improve my SEO game. This helps a lot. I’ll keep these points in mind for my future posts and edit the older ones. Thank you! 🙂
No problem dear! I’ll post something about SEO this month so I hope it can help you 🙂
Thank you for reading! 🙂
This is a great post! Some of these I already do like adding alt text, links, featured & Pinterest images, but I do need to start doing keyword research!
Thank you for reading, Karalee xxx
I have been using the Yoast plugin but recently I’ve noticed that a lot of bloggers have been using Rank Math instead. Have you tried Yoast before? If so, what are your thoughts on the differences and why did you choose Rank Math? Thanks!
Yeah, I’ve noticed that too! I’ve tried Yoast in the 1st week after launching my blog then I found Rank Math and I love it more than Yoast! How should I put it? Rank Math is faster, easier, and it has more modern-day SEO features plus it’s not slowing down your site. Another amazing one with Rank Math is Google Keyword Suggestion, when you start typing the focus keyword, it starts suggesting the keyword (long-tail keyword) and that comes directly from Google. You can target up to 5 keywords with Rank Math vs. the free edition of Yoast, just 1. Most of the functionality you’ll use regularly, like adding meta tags to a post, works very similarly to Yoast. But, instead of Yoast’s SEO ratings of ‘bad,’or ‘good,’ Rank Math scores your content out of 100. I prefer this as it provides much more granular feedback about my content and what certain changes will do. For me, there are so many great things you can have from the free ver. of rank math while I know that you need to have premium ver. of yoast to get these 🙂 You can try rank math first then if you prefer yoast more, you can always switch back xxx
I adored this blog post. Super helpful!
Miki x
https://www.littletasteofbeauty.com/
Thank you 😀
Great post, covered the whole topic. Thanks for sharing. I am using Yoast but now will try Rank Math.
Nice to hear that 😀
This is a great post Merry! I do a lot of these already and I couldn’t be more glad. I use Yoast SEO and I also noticed that while a lot of people love it, a lot of people have noticed that it doesn’t really much for SEO. I am planning on making the switch to rank maths as so many people seem to be using it and have had great experiences with it. Thank you for sharing.
I used Yoast before switching to Rank Math! I can say that I love Rank Math more than Yoast haha thank you for reading Ruth 😀
Great tips! I’m still quite new to blogging so these were super helpful – I think I definitely need to work on my seo and pinterest in particular for the time being! Thanks for sharing x
Thank you so much for reading 😀
Great post! These are all the points that I try to do myself as well, but I sometimes miss one or two haha. But ever since I starting using Notion to track my tasks, and Rank Math reminds me of many things with it’s handy checklist, I’ve been pretty much staying on top of these things. And they make so much difference! Definitely worth the extra effort.
Fabulous tips/steps here! You’ve included so many useful and practical ways to improve blog posts. This is perfect for beginners
This is excellent! I’ve been blogging for a long time but have never come across such a succinct and easy to follow guide to SEO optimisation. Thank you
I love how detailed you have been in this post – super helpful! I used to do SEO a lot, but since I do not have a lot of time, I have been rushing it. I will definitely be optimising my posts in the summer when I do not have uni 🙂 x